Back to Wiki Home
Back to Raiding Page

The Bastion of Twilight is located in Twilight Highlands, the entrance being on top of a large twisted spire.
Bosses:
- Halfus Wyrmbreaker
- Theralion & Valiona
- Ascendant Council
- Cho'gall
- Sinestra (Optional, Heroic only)
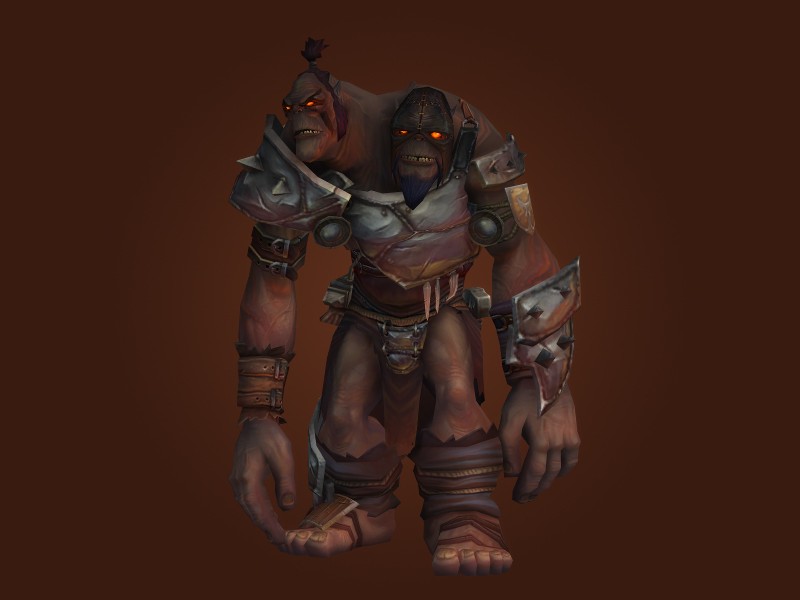
Halfus Wyrmbreaker
Strategy
Phase 1
-
You will need 2 tanks for this fight. One for Halfus, and one for the various drakes you will free. Tank rotation may be needed, but more about that later.
-
As you enter the room, you will see five drakes, two of which will be Unresponsive, and you can forget about them. The other three will grant Halfus different buffs for the duration of the fight. However, if you free them, they will also debuff the boss in a way that will partially counter the buffs they are giving him. Unfortunately, if you free them, you will have to kill them as well to gain Dragon's Vengeance.
-
Slate Dragon - Grants Malevolent Strikes to the boss which forces a tank swap thanks to a stacking mortal strike. If freed, he will periodically stun Halfus for 12 seconds with Stone Touch. Malevolent Strikes can be removed with Blessing of Protection or Divine Shield. Coordinate this with your healers.
-
Nether Scion - Grants Frenzied Assault to the boss. If freed, he will use Nether Blindness on Halfus, reducing his damage, attack speed, and hit chance by 25%.
-
Time Warden - Grants Fireball Barrage to the Proto-Behemoth. If freed, he will use Time Dilation, greatly reducing the fireballs' speed.
-
8x Orphaned Emerald Whelp - Grant Scorching Breath to the Proto-Behemoth. If freed, they will reduce all of the Behemoth's damage by 6,000 with Atrophic Poison.
-
Storm Rider - Grants Shadow Nova to the boss. If freed, he will debuff Halfus with Cyclone Winds, increasing the cast time of Shadow Nova to 1.5 seconds and making interruptible. This must be interrupted or else the raid will be knocked back and possibly wipe.
-
-
The order in which you free the drakes, and how many of them you free at a time, depends greatly on both your group's composition and the drakes which are available to you. For example, Nether Scion and Slate Dragon are a very deadly combination, as they not only give a healing debuff to the boss' melee attacks, but also make it stack twice as fast. Time Warden and the Emerald Whelps are another dangerous combination, because of the high raid damage. Keep a dedicated interrupter on Halfus to interrupt Shadow Nova and simplify things.
-
You will want to free/kill all of the drakes. Each one you kill will debuff the boss with Dragon's Vengeance when he dies, so you can win the race against the tight 6-minute Berserk timer.
-
Other than what the drakes give him, Halfus has no abilities in Phase 1. It is the hardest phase and most healing-intensive, so try to get through it quickly. Make sure you use Bloodlust/Heroism/Time Warp either as soon as the third drake is down, or--if you choose to free two at once--whenever there are two up.
Phase 2
-
At 50% Halfus will enter the next phase. You want all of the drakes dead by this time, as he will start using Furious Roar. He will use this frequently in this phase, shouting three times in a row. Every shout will stun you for 2 seconds, so you will only be able to use instant spells between the roars.
-
Normally, if you get to this phase, you are past the hard part. With enough DPS, Halfus should be dead soon. Try to use your Bloodlust/Heroism/Time Warp before entering Phase 2, since the Furious Roars will make part of its duration go to waste. Alternatively, if the Furious Roar damage (possibly combined with Shadow Nova) is proving to be too much damage for you, you can use Time Warp in this phase, in order to minimize the number of roars your raid has to take.
-
The Proto-Behemoth will continue casting Fireball Barrage in phase 2. It is possible to be knocked down by a Furious Roar into a barrage. However, it is possible to strafe out of fire graphic between roars, even though you are unable to cast spells.
-
Halfus will cast Shadow Nova soon after Furious Roar. To save healer mana, have a mage use Blink to get out of the last roar and counterspell the cast.
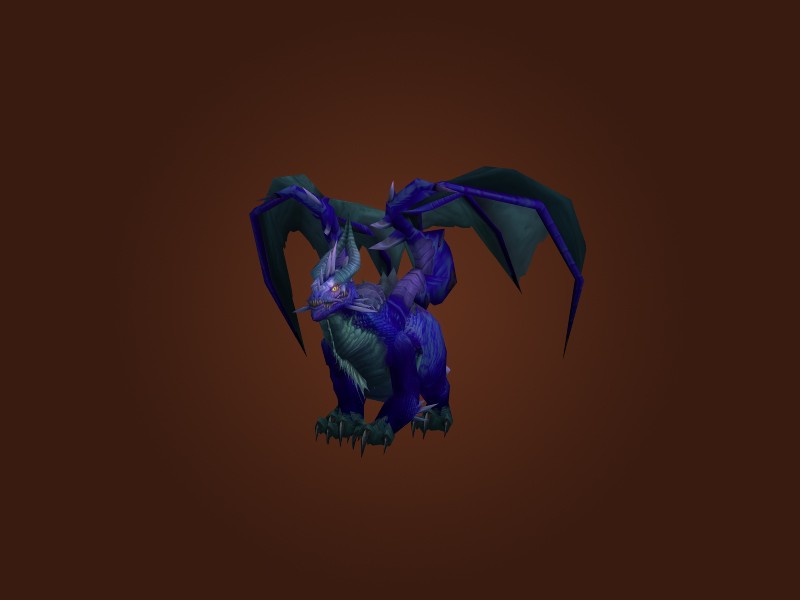
Theralion & Valiona
Overview
-
Valiona and Theralion are dragons that share a health pool; however only one will be directly attacking you at the ground at any one time. You will want one tank for this encounter.
-
The first dragon you will fight is Valiona. Note that both she and Theralion are on the ground initially, but pulling Theralion first will only result in him flying off and forcing Valiona to engage you.
-
The setup of the fight has you fighting Valiona first, while Theralion attacks your raid from the air. A short transition phase follows, then Theralion lands and needs to be tanked, while Valiona rains hell on your heads. Another transition phase (different from the first one), and it's back to Valiona. Rinse and repeat.
-
This fight greatly favors DPS that can double-dot both the dragon on the ground and in the air. Shadow priests, Moonkins, and Warlocks with Bane of Havoc are all a plus.
Strategy
Phase 1
-
During this phase Valiona will be the boss on the ground--the one you need to tank--and Theralion will be in the air, thwarting your raid.
-
Position Valiona on the stairs she is currently at, facing her away from the raid. You will want everyone spread out at about 8 yards away from other players. The tighter together you are without getting closer than 8 yards, the easier the fight will be.
-
In this phase, Valiona will use only two abilities--Blackout, followed shortly by Devouring Flames. The moment you see Blackout happen, you will all want to collapse/stack at a predefined location (Valiona's tail works well for that). As soon as everyone is stacked, have a designated healer dispel the magic debuff, then quickly spread out again. Dispelling the debuff before stacking up will nearly kill a few players. Classes such as mages, paladins, and rogues can safely remove Blackout, as long as they are far enough away from the raid.
-
Devouring Flames is generally easy to avoid. The ability is identical to the one used by Valiona during the third encounter in Grim Batol: she will face a random player, cast her breath, and then cover everything in front of her with flames. As in Grim Batol, if you absolutely can't get to her side/back, run away from the flames and try to self-heal--the damage is proximity-based.
-
Theralion's only ability in this phase is Twilight Blast, which he will cast frequently on random raid members. This is the reason you want to stay 8 yards apart; stacking during Blackout is the reason you don't want to be at much more than that.
-
During the transition phase Theralion will cast Dazzling Destruction, which fires several pairs of void zones in random locations. Large purple swirly marks indicate where the spell will hit, so you should be able to avoid it easily. Note that if you get hit by one of those, you will be sent to the Twilight Realm, where you need to navigate through a score of Twilight Fiends and orbs. You will need to find a portal to send you back to the physical world.
-
The very first ground phase will end soon after the second Blackout. Every ground phase after that will always have a third Blackout, which happens during Dazzling Destruction. Try to keep the center of the room clear, so that you can stack there and get rid of the debuff.
Phase 2
-
This is Theralion's phase. He will land in the middle of the room and should be tanked there. Your melee should be stacked somewhere behind him, and your casters spread out at predefined locations.
-
Theralion's signature move in this phase is Engulfing Magic, which he will cast frequently on random raid members. This is the reason you want to stay 8 yards apart.
-
Fabulous Flames is Theralion's other ability, but unfortunately there is nothing you can do to counter it. Run out of the dark purple void zone that spawns.
-
While flying in the air, Valiona will shoot Twilight Meteorites at players in the ranged pile. Unlike Dazzling Destruction, those actually target the player, so moving won't save you--it will, in fact, kill you, if you run the wrong way away from the raid. You will get a purple arrow over your head if targeted with the Meteorite. If you are melee, stay put and stacked up. If you are ranged, run into melee so the meteorite damage can be split equally among everyone stacked within 8 yards.
-
The transition phase here has Valiona using Deep Breath three times (reminiscent of Felmyst from Sunwell Plateau). She will fly across the room three times, every time covering a random third of it with fire. Have a designated raid member call out the side she will be burning, so that everyone can move out of the fire. Raid markers on the ground help a bit with this--calling "X side!" or "Star side!" is easy to visualize. Should you get hit by the flames, you will be sent to the Twilight Realm; don't worry, you already know how to escape from it.
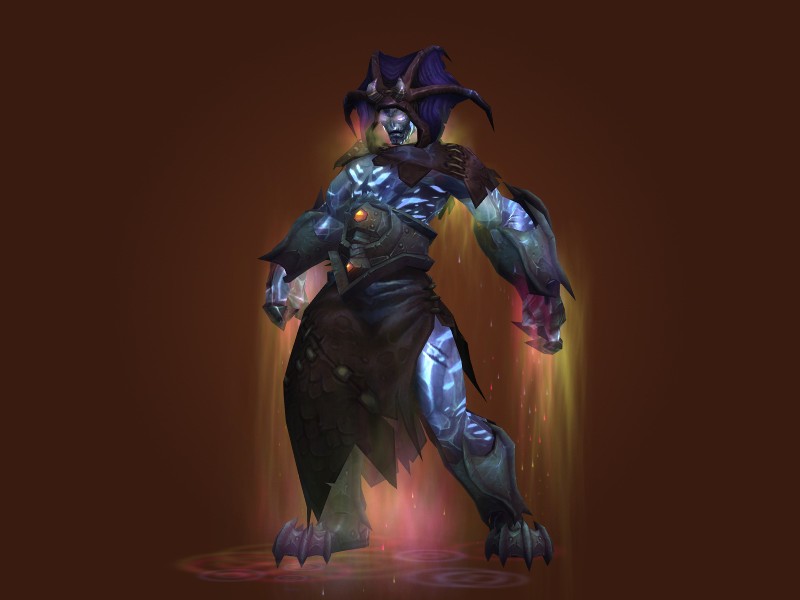
Ascendant Council
Overview
-
The Ascendant Council is a three phase council fight. During the first phase, you fight Feludius and Ignacious - water and fire ascendants. During the second phase, you face Arion and Terrastra - air and earth ascendants respectively. During the last phase, you must defeat all four, as they merge together into an Elementium Monstrosity.
-
Both phases 1 & 2 end when one of the ascendants present reaches 25% health. Since the Elementium Monstrosity's health is the combined health of all four ascendants, you will want to bring all four to about 25%.
Strategy
Phase 1
-
Feludius is a water ascendant, a counterpart to Ignacious - his partner during phase 1. You will want your ranged DPS on him.
-
Hydro Lance is a spell that needs to be interrupted. It does a lot of damage if it's not.
-
Water Bomb will make Feludius throw water bombs at random locations around the room. If you get hit by this, you will become Waterlogged. You need to remove this debuff ASAP by walking through the fire trail left by Ignacious.
-
Feludius will occasionally debuff one of your raiders with Heart of Ice. Have that person run quickly to the melee pile, giving them extra damage against Ignacious. Have a designated healer dispel it after that.
-
Glaciate is Feludius' big move in this phase. It will instantly kill any players with Waterlogged, and will have similar effect to all players close to him. To counter it, run away from him at the beginning of the cast (tank included), and get rid of your Waterlogged quickly. Also, make sure to interrupt the Hydrolance that tends to follow.
-
Ignacious is a fire ascendant, a counterpart to Feludius - his partner during phase 1. You will want your melee DPS on him.
-
Flame Torrent will be channeled in front of Ignacious. It does quite a bit of damage, so it's recommended for your tank to use a minor defensive cooldown on as many Flame Torrents as possible. Note that while Ignacious will follow his target if you run around him, he will remain stationary while casting - so you can, technically, outrange the spell and avoid some of the damage.
-
Inferno Leap & Inferno Rush is a combination that will make Ignacious jump to a random ranged member, do damage to them, then charge back to his tank, leaving a trail of fire behind him. Use the trail of fire to remove the Waterlogged debuff Feludius' Water Bombs will put on you.
-
Ignacious will occasionally debuff one of your raiders with Burning Blood. Have them run to the ranged "pile", in order to grant them extra damage against Feludius. Make sure you dispel the Burning Blood debuff after that.
-
Aegis of Flame & Rising Flames are Ignacious' big move. First, he will put the Aegis of Flame shield, and then he will begin channeling Rising Flames. The former will make him immune to interrupt (until the shield is broken through damage), and the latter will continuously do AoE to the entire raid, increasing his damage with each successful tick. To counter this, you need to have all your DPS switch to Ignacious as he is casting the shield - or even better, 3-5 seconds before he does it, - burn through it ASAP, and then interrupt Rising Flames. If done right, you shouldn't get more than 2-3 ticks.
With all DPS switching to burn down Ignacius’ shield, it is most likely that Feludius’ HP will be higher. Wait until both health pools are equalized before pushing one to 25%.
Phase 2
-
Arion is a air ascendant, a counterpart to Terrastra - his partner during phase 1. You will want your ranged DPS on him.
-
Arion will put Lightning Rod on a random player several times during the encounter. This player needs to run as far away from other people as humanly possible. The reason being, Arion will shoot a chain lightning at that player after a few seconds. The chain lightning has a long jump range, and does more and more damage with each jump. After one chain lightning goes out, the afflicted player is safe to move back into the raid.
-
Disperse & Lightning Blast are a combo Arion will do every so often during the fight. He will teleport to a random location in the room - preferring the walls, it seems - and start casting Lightning Blast right after that. If you can get an interrupter close to him in time to prevent the spell, do so. If not, have your tank pop a defensive cooldown - not because the damage is fatal, but because that's the only thing a cooldown should be used for in this phase.
-
Arion will Call Winds occasionally. This will summon slowly-moving tornadoes somewhere in the room. All players need to "tap" the tornado in order to receive the Swirling Winds debuff needed to avoid Terrastra's ultimate - Quake, which will always be the first ultimate cast in phase 2.
-
Thundershock is Arian's ultimate. To avoid the massive damage caused by this spell, "tap" one of Terrastra' Gravity Wells in order to gain its Grounded debuff.
-
Terrastra is an earth ascendant, a counterpart to Arion - her partner during phase 1. You will want your melee DPS on her.
-
Terrastra will cast Eruption frequently in this phase. Rock spikes will appear around her - avoid them in order to avoid the damage that will follow them soon.
-
Harden Skin is a shield Terrastra will put on herself. It has a 1-second cast time, so if you can interrupt it, do so - but it's not easy. If you fail to interrupt the cast, the ascendant lord will gain 100% extra damage for 30 seconds, as well as 50% damage absorption. If you break the shield through damage, Terrastra will take all of the absorbed damage at once (which is about 10% of her health). Interrupting the shield and burning through it turns out to be about the same amount of damage, so it's up to you. It is, however, recommended that you burst the last shield, as it can bring the boss to below 25%, which will make the last phase easier.
-
Terrastra will summon stationary Gravity Well throughout this phase. They and their Grounded debuff work similarly to Arion's tornadoes - you need to "tap" one of those some time before a Thundershock.
-
Quake is Terrastra's ultimate. To avoid the massive damage caused by this spell, "tap" one of Arion's tornadoes in order gain its Swirling Winds debuff.
Phase 3
Elementium Monstrosity
-
The Elementium Monstrosity is a combination of all the previous ascendants - it uses one ability of each elemental type.
-
Cryogenic Aura will drop patches of Liquid Ice underneath the Monstrosity. The longer the creature stands in them, the wider they will become - and the more damage they will do. Kite the boss out of them and along the edges of the room.
-
Lava Seed will drop Flare-like fire balls around the room. Avoiding them should be simple enough,
-
Gravity Crush will imprison a few players in a gravity prison, doing a total of 96% of their total health as damage over its duration of 6 seconds. Players trapped by this will take a lot of falling damage as well, so make sure you heal them.
-
Electric Instability is a chain lightning-like spell the Elementium Monstrosity casts passively. It does more damage the longer the fight goes, which adds a soft enrage timer to the encounter.
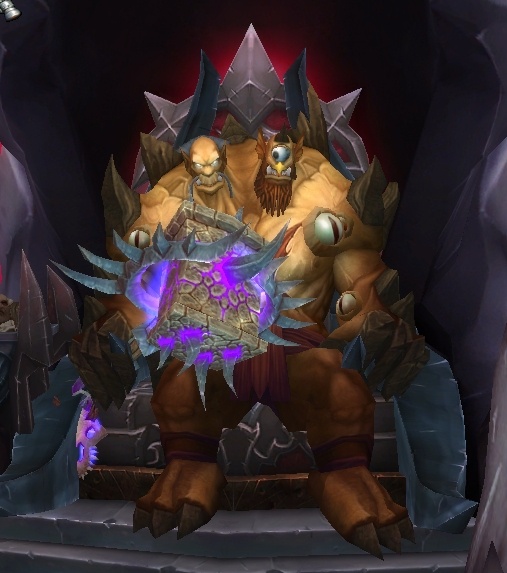
Cho'gall
Overview
Corruption Mechanic
-
As an encounter, Cho’gall relies on Corrupted Blood as its key mechanic throughout its duration. Players will gain corruption throughout the fight and should try avoiding being corrupted as much as possible. As the corruption level of a player rises, they will gain new debuffs. When they hit 25% corruption, they are inflicted with Corruption: Accelerated (dispel as soon as possible). At 50% corruption, Corruption: Sickness (turn away from raid members to avoid damaging them). At 75% corruption, Corruption: Malformation. Finally, at 100% corruption players receive Corruption: Absolute and will ultimately die.
Strategy
Phase 1
-
Tank Cho’gall by his throne with two tanks; have ranged and melee group up. He will occasionally cast Conversion—if it is not removed within 3 seconds of casting, it will buff him with Twisted Devotion. Conversion effectively mind controls players, making them worship Cho'gall, and needs to be interrupted as quickly as possible. This is why standing in groups is best; you can use Psychic Scream or other AoE interrupts to quickly break Conversion. Have Mages assigned to Counterspell anyone who is mind controlled away from the raid.
-
Have tanks taunt the boss of one another when inflicted with Fury of Cho'gall. Cho’gall will alternate between casting Shadow's Orders (heavy healing on raid) and Flame's Orders (and fire puddles spawned at random). Know what each call means for healers.
-
Cho’gall will summon a Corrupting Adherent which will cast Corrupting Crash and Depravity. Have the off tank drag these back to the stairs for the ranged to DPS. Make sure the raid avoids being hit with either spell as it will increase Corruption. The raid should run away each Corrupting Crash then collapse back together so that Conversion can still be handled easily with AoE interrupts; for Depravity, have assigned interrupters to the mob.
-
30 seconds after Cho’gall summons a Corrupting Adherent, he will cast Fester Blood and spawn Blood of the Old God. More will spawn each time. Use snares and stuns to keep these from reaching the raid and have ranged DPS AoE them down then turn back to attacking Cho’gall. If Blood of the Old God reaches the raid, players will gain Corruption.
Phase 2
-
At 25%, phase two begins. This part of the phase is a DPS race—you must kill Cho’gall before you and your raid members become corrupted. If a Corrupting Adherent is alive, it will despawn at this point. Split into smaller groups while keeping him tanked in the same place with the same tank switches and healing calls used in phase one.
-
In this phase, Cho’gall will use Darkened Creations. These adds will spawn in a circle around him; interrupt, stun, and kill these before they have a chance to cast Debilitating Beam on raid members. Move Cho’gall onto his throne stairs to force the Darkened Creations to spawn closer together. Have DPS burn these adds then refocus to the boss after they are all dead. As corruption rises, raid damage will rise and the earlier debuffs mentioned will start appearing so be on the lookout for them.
Heroic Mode
-
Heroic mode makes two Corrupting Adherents spawn at the same time instead of one which requires another tank. This also means there will be 10 blood instead of 5 to slow, snare, and kill.
-
When Cho’gall alternates between casting Shadow's Orders (heavy healing on raid) and Flame's Orders (heavy healing on tank), he will also spawn a Shadow Lord or a Fire Elemental respectively. These must be damaged as they will each put a buff on Cho'gall that continues to stack; Empowered Shadows and Flaming Destruction.
-
In phase two, when Cho’gall uses Darkened Creations, Spiked Tentacle will also spawn. They cannot be efficiently killed; instead, they serve to add extra raid damage to watch out for.
Sinestra (Heroic ONLY)
Strategy
Phase 1
-
Sinestra is an unforgiving, brutal encounter with high DPS requirements and intense raid damage. For this encounter you will use two tanks for this fight: one main tank and one off tank which will handle the adds that spawn.
-
As you pull Sinestra, she will use Call Flames to conjure flames that will cover the ground to block off the path to her eggs.
-
Shortly after combat has been engaged, Sinestra will afflict one raid member with Wrack. This is a nasty debuff that deals periodic shadow damage that increases over time. Wrack lasts for one minute, but it will kill the player it’s on long before that so it must be removed. However, when it's dispelled from a player, it jumps to two additional targets in order to punish raids for premature dispels. It expires after a minute no matter how many targets it's on and then gets recast on the raid. Assign one main dispeller (a DPS) to remove Wrack from a target after approximately ten seconds after its application. Assigning a secondary dispeller (a healer) is also a good idea for the latter half of the minute duration.
-
Sinestra’s primary ability is Flame Breath. She casts it every 20 seconds and it afflicts everyone in the room. Note that while it still does a lot of damage, it does a lot less in phase one as she has a debuff which cuts her damage.
-
Every 30 seconds, she will spawn two Twilight Orbs on a random raid member. After a couple of seconds, they will begin to Shadow Pulse, damaging anyone within ten yards. After they start pulsing, they will fire beams between them called Twilight Slicer. They’re an instant death to anyone who strays within them so a general rule of thumb is to move away from eggs the second they spawn.
-
Every 50 seconds, 5 Twilight Whelps will join the fray. They will aggro random targets and cast Twilight Spit on them. They should be picked up by the off tank and healers should be close to this tank so they can easily pick up spawning whelps.
Phase 2
-
When Sinestra’s health reaches 30%, phase 2 begins. The raid should move towards the back of the room at this time, bringing the Twilight Whelps with them to be AoE’d down. Sinestra will start the phase by healing herself to full and casting Mana Barrier on herself. This will essentially make her completely immune to damage. She will then begin to cast Twilight Extinction. A friendly NPC, Calen, will cast Fiery Barrier to negate this spell in the back of the room and the raid must be within the barrier to survive by the time Sinestra's cast finishes.
-
Ranged DPS should stay on Sinestra to bring down the Twilight Carapace buff on two Pulsing Twilight Eggs; after enough damage is done to Sinestra, the two eggs will become attackable. Meanwhile, melee should focus on killing the Twilight Whelps that are up from phase one. Whenever a whelp dies, it leaves a Twilight Essence which causes Whelps that die in that area to respawn (it's essentially a void zone).
-
After casting the barrier, Calen will be afflicted by Pyrrhic Focus which restores his mana at the cost of his health throughout the phasel; assign a healer to him to keep him up.
-
After she’s finished casting Twilight Extinction, the main tank should prepare to pick up Twilight Drake in the middle of the room; they will do Twilight Breath so make sure they are facing away from the raid. Melee should stay back with the off tank and hopefully dead whelps, preparing to deal with Twilight Spitecaller as they spawn and DPS the drakes when they have time. Ranged DPS steal the show here; they must attack the eggs when Twilight Carapace is removed from them and should be split into two equal groups. They should switch back to Sinestra if unsuccessful in killing the eggs to work on removing the debuff again.
-
Phase three will start once both Pulsing Twilight Eggs are dead. As she transitions into phase three, clean up the remaining adds.
Phase 3
-
Phase three is like phase one so have everyone move back to their original positions and watch out for Wrack. All members of the raid will receive Essence of the Red to allow the raid to be healed through the damage. Despite the buff, it will be very hectic.
-
Whelps should be picked up and tanked in the back of the room this time. In order to keep them from resurrecting each other with their deaths, each Twilight Whelp should be pulled out of the pile at a low percentage and brought away from the other whelps to die. There should be pre-assigned DPS to pull them out as well as pre-assigned places to drop them; they should be dropped as close together as possible without causing a resurrection because these void zones will eventually become unmanageable. Bad placement of these will result in premature wipes.
-
After three minutes, Essence of the Red will fade from the raid. This is the point of no return. The room will be littered with void zones, Wrack will be wrecking the raid, and your off tank will likely have high stacks of Twilight Spit from the Twilight Whelps. Tank swapping is generally a good idea unless your tank is a Paladin that can Divine Shield the debuff off. Consider using a cooldown on the off tank and have him take Sinestra from the main tank while having the main tank pick up adds for the last few percentage if needed.
-
Near the very end, it’s best to just off tank the last few waves of Whelps and have the DPS maximize their DPS on the boss. A Divine Hymn rotation is also ideal here.