Madness of Deathwing
Dragon Soul Main Page
![]()
Overview of the Fight
The Madness of Deathwing encounter is a two phase fight.
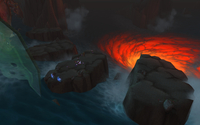 During Phase One, you will have to defeat 4 of Deathwing's limbs (two wings and two arms). This part takes place on 4 different platforms, surrounded by water. Each of Deathwing's limbs rests on one platform, and your raid will have to travel to every platform and kill all the limbs in order to make it to Phase Two.
During Phase Two, your raid will have to burn Deathwing's head, who will have crashed next to one of the platforms (where the entire phase is spent). At the same time, your raid will have to regularly kill two types of adds. Deathwing's health will initially be at 20% and he will deal increasing raid damage as he nears death.
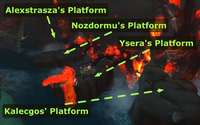 Throughout the fight, your raid will have assistance from the four dragon Aspects (though, Thrall also offers a minimal contribution). Each Aspect is flying over one of the four platforms, resulting in the following naming conventions for the platforms in this guide:
- Leftmost platform: Alexstrasza's Platform;
- Middle-left platform: Nozdormu's Platform;
- Midle-right platform: Ysera's Platform;
- Rightmost platform: Kalecgos' Platform.
Each of the Aspects offers the raid a specific buff (such as increased health) and uses a specific ability.
- In Phase One, once an Aspect's platform has been cleared of Deathwing's limb, that Aspect will cease to assist the raid and focus solely on attacking Deathwing. This means that Phase One becomes increasingly difficult as you progress, and your raid will have to choose the order in which to clear the platform carefully.
- In Phase Two, the Aspects are once again fighting alongside your raid and they resume their assistance.
Buffs Provided by the Aspects
 During Phase One, all the buffs, except for Thrall's, only last until the platform of the respective Aspect has been cleansed of Deathwing's limb, at which time the Aspect will begin assaulting Deathwing and will cease to aid your raid until Phase Two begins. Thrall's buff lasts for the entire duration of the encounter.
Thrall's Buff
Thrall's buff is the least noticeable one: he grants your raid ![]() Carrying Winds for the entire duration of the fight. This allows you to move back and forth between two adjacent platforms. To do so, simply run or jump off your current platform in the direction you wish to go. Additionally, following each jump, you will gain a 60% movement speed increase for 10 seconds (this buff stacks twice).
Carrying Winds for the entire duration of the fight. This allows you to move back and forth between two adjacent platforms. To do so, simply run or jump off your current platform in the direction you wish to go. Additionally, following each jump, you will gain a 60% movement speed increase for 10 seconds (this buff stacks twice).
This buff does not play any evident role in the fight, and it simply allows you to move around freely between platforms.
Ysera's Buff
![]() Ysera's Presence is a passive buff that increases all healing done by 20%.
Ysera's Presence is a passive buff that increases all healing done by 20%.
![]() Dream is an ability that Ysera grants to all raid members. Players receive an extra action button, with a 30 second cooldown. Using this ability grants the player 50% damage reduction for 5 seconds.
Dream is an ability that Ysera grants to all raid members. Players receive an extra action button, with a 30 second cooldown. Using this ability grants the player 50% damage reduction for 5 seconds.

This ability can be keybound from the Key Bindings Menu (it is called ExtraActionButton1 and it is located in the Action Bar Functions section). The button may may not display properly (or at all) if you are using any action bar add-ons, although this does not affect the aforementioned key-binding's efficiency. Alternatively, you can use the following macro:
- /click ExtraActionButton1
Clicking this macro (which, of course, can be keybound), has the same effect as clicking the Dream button.
Alexstrasza's Buff
![]() Alexstrasza's Presence is a passive buff that increases maximum health by 20%.
Alexstrasza's Presence is a passive buff that increases maximum health by 20%.
Alexstrasza's ability varies from Phase One to Phase Two:
 Cauterize (Phase One) destroys all Blistering Tentacles (adds that spawn at certain times during Phase One);
 Cauterize (Phase Two) lowers the damage done by
  Corrupted Blood (Deathwing's unique ability during Phase Two).
Nozdormu's Buff
![]() Nozdormu's Presence is a passive buff that increases your haste by 20%.
Nozdormu's Presence is a passive buff that increases your haste by 20%.
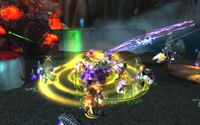 Nozdormu's active ability is
 ![]() Time Zone, which places a type of protective bubble on the platform where the raid is currently fighting. This causes the Elementium Bolt (a type of projectile NPC that flies towards the raid) to be greatly slowed down, giving your raid more time to kill it. It also reduces the attack speed of any enemies within the zone by 50%.
Time Zone, which places a type of protective bubble on the platform where the raid is currently fighting. This causes the Elementium Bolt (a type of projectile NPC that flies towards the raid) to be greatly slowed down, giving your raid more time to kill it. It also reduces the attack speed of any enemies within the zone by 50%.
Kalecgos' Buff
![]() Kalecgos' Presence is a passive buff that increases damage dealt by 20%.
Kalecgos' Presence is a passive buff that increases damage dealt by 20%.
Additionally, Kalecgos imbues your raid with ![]() Spellweaver, which causes all attacks to deal 23,000 amount of Arcane damage to enemies within 6 yards.
Spellweaver, which causes all attacks to deal 23,000 amount of Arcane damage to enemies within 6 yards.
Phase One
Phase One is started by talking to Thrall, located on Ysera's platform.
On each of the 4 platforms, your raid must perform the same set of tasks to destroy Deathwing's limb. Depending on the platform, the Deathwing's limb is either an Arm Tentacle or a Wing Tentacle. Out of the 4 limbs, 2 are Arm Tentacles (Nozdormu's Platform and Ysera's Platform) and 2 are Wing Tentacles (Alexstrasza's Platform and Kalecgos' Platform). The only differences between these two types of adds are their name and their visual appearance. Other than that, they cast the same abilities and have the same amount of health.
The strategy remains very similar from one platform to the other, just that the mechanics of the fight will be increasingly harder to deal with, as you progressively lose the buffs granted by the dragon Aspects (when you kill the limb on their platform, they go fight Deathwing himself and stop buffing the raid).
Enemies, Abilities and Their Interaction
During this phase, you will have to defeat several types of adds, in a specific order and fashion, so that you can eventually destroy all of Deathwing's limbs. Below, we will list every add you encounter during Phase One, all of their abilities and the way in which they interact.
Deathwing
Deathwing does not exist, during Phase One, as an attackable NPC. He does however use a few abilities and your raid will need to destroy his limbs, either an Arm Tentacle or a Wing Tentacle, depending on the platform.
 Assault Aspects is an ability that Deathwing casts on the dragon Aspect on whose platform the most raid members are located. This ability simply determines on which platform the adds will spawn (the one where most of your raid is located) and is a means of allowing you to choose the order in which to tackle the platforms.
-
 Elementium Bolt is a projectile that Deathwing fires at the platform where your raid is currently located, 45 seconds after he has finished casting Assault Aspects. Upon reaching the platform, the Elementium Bolt will deal massive Fire damage to the entire raid with
  Elementium Blast. This initial hit deals less damage the farther away players are from the impact zone. 5.2 seconds after landing, Elementium Blast will tick again, for yet another massive Fire damage hit. This NPC cannot be tanked, and it does not melee. It has a small health pool and your DPS players can and should try to kill it before it lands.
  Cataclysm is an ability that Deathwing begins casting 2 minutes after he has chosen an Aspect to assault. It has a 60 second cast time, at the end of which you will wipe (it deals 1.5M damage). The only way to stop this cast is to kill the Arm Tentacle or the Wing Tentacle present on the platform where you are fighting.
Arm Tentacles and Wing Tentacles
Arm Tentacles and Wing Tentacles are the limbs of Deathwing (they look like tentacles) that you need to destroy during Phase One. These adds do not melee and cannot be tanked. In order to clear a platform, your raid will have to kill the limb attached to the platform.
Deathwing's limbs have a high amount of health, and your raid will have to deal with different kinds of adds before the limbs can be finished off.
Arm Tentacles and Wing Tentacles do the following:
-
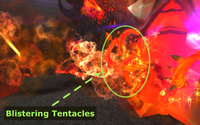 At 70 and 40% health, they spawn several Blistering Tentacles. These adds are immune to AoE damage, and they deal increasing raid damage, by stacking
  Blistering Heaton raid members.
- If Alexstrasza's platform is still active, then her
 Cauterize (Phase One) ability will quickly kill all of the Blistering Tentacles.
 - Otherwise, your raid will have to single-target them down.
- If Alexstrasza's platform is still active, then her
- 90 seconds after engaging a Tentacle, it will begin to hemorrhage. This will spawn 6 Regenerative Blood adds.
- For the entire duration of their existence, the tentacles will deal a small amount of damage to the raid, every 2 seconds (
 Burning Blood). This damage is greater the lower the tentacle's health is.
Regenerative Blood
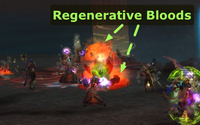 6 Regenerative Bloods are spawned by Arm Tentacles and Wing Tentacles 90 seconds after they have been engaged. These small adds have normal aggro tables and have fairly weak melee attacks.
Their attacks stack ![]() Degenerative Bite (10-man/25-man/LFR) on the tank. This eventually overwhelms the healers.
Degenerative Bite (10-man/25-man/LFR) on the tank. This eventually overwhelms the healers.
Regenerative Bloods have an energy bar with a maximum capacity of 100, which starts empty and fills at a rate of 10 energy per second. Each time the bar reaches 100 energy, the respective Blood will be healed to full health (50% health in LFR difficulty).
These adds are easy to AoE as long as Kalecgos is up (thanks to the damage-splashing ability, ![]() Spellweaver, that he imbues raid members with).
Spellweaver, that he imbues raid members with).
Mutated Corruption
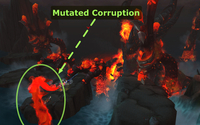 Mutated Corruption is a tentacle add that spawns 10 seconds after Deathwing assaults an aspect (when the raid has just started the fight or switched to a new platform). It has two abilities:
 Impale is a massively damaging attack that the Mutated Corruption performs on the main tank. It deals an immense amount of Phsyical damage (260,000 in LFR and 400,000 in 10 and 25-man difficulty), for which the tank will have to use defensive cooldowns. Additionally, tanks can make use of Ysera's
  Dream to survive this attack, while she is still active.
 Crush is a very damaging AoE attack that the Mutated Corruption uses regularly. It will target a random raid member, and damage everyone in a line between the Corruption and the target for a high amount of Physical damage (65,000 in LFR and 100,000 in 10 and 25-man difficulty).
Strategy
The strategy for Phase One consists in clearing each of the 4 platforms. A platform is cleared when the respective Arm Tentacle or Wing Tentacle (Deathwing's limb) is killed. In order to do this, the raid must perform a series of tasks. Fortunately, these tasks are identical between all 4 platforms, so the fight is not very difficult to understand.
Platform Order
The first thing that your raid must decide on is the order in which to clear the platforms. This will determine the order in which you will lose the buffs from the Aspects, and which of the buffs you will get to keep until the final platform.
While it is possible to successfully complete the phase by clearing the platforms in any order, we will only detail the order that we recommend as being optimal:
- Ysera's Platform;
- Alexstrasza's Platform.
- Nozdormu's Platform;
- Kalecgos' Platform.
Before starting the encounter, you should position your entire raid on Ysera's platform (where you land after parachuting down from Deathwing's back), and speak with Thrall to pull the boss.
Clearing a Platform
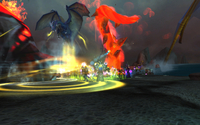 The first thing you will notice, when clearing a platform, is the massive Arm Tentacle or Wing Tentacle right in front of you. Your DPS players should immediately begin attacking it, and you should try to do as much damage as possible to it before the Mutated Corruption appears. Then the raid encounter will follow these steps:
- After 10 seconds, a Mutated Corruption will appear.
- The tanks should position themselves towards the back of the platform and they should be ready to taunt the Mutated Corruption as soon as it spawns. When this happens, all DPS players should switch to it and burn it down.
- Tanks and healers will have to pay special attention to the
 Impalecast and make sure that the tank is protected against this. This can be done in one of several ways (or a combination of them):
- Tanks can use damage reducing defensive cooldowns.
- Healers can use damage reducing cooldowns on the tanks, or
 Guardian Spirit.
- In case the tank does not have any way of surviving another Impale, the off-tank should taunt and use one of their own cooldowns.
- At a certain point, while DPS-ing the Mutated Corruption, Deathwing will launch an Elementium Bolt towards the platform.
-
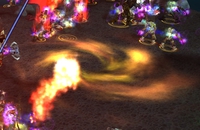 The exact location when the Elementium Bolt will land is marked by a golden swirling void zone. Everyone should move away from the impact spot, as the damage that the Bolt does, when landing, is greater to players closer to it.
 - Prepare for the massive damage to the raid that the Bolt deals when it lands (through
 Elementium Blast). Defensive cooldowns such as
  Power Word: Barrier and
  Aura Mastery are useful here.
  Anti-Magic Zone is also an extremely useful cooldown that can be used for every single Elementium Bolt.
 - The Elementium Bolt must be destroyed as soon as possible. The idea is to kill it between the moment when it lands and the moment when
 Elementium Blast ticks again, 5.2 seconds after landing.
-
- After the Bolt is dead, players should return to the Mutated Corruption and finish it off, then switch back to the Arm Tentacle.
- After 90 seconds, the Arm Tentacle will spawn 6 Regenerative Bloods. Your raid should simply AoE these adds down (while tanking them close to the Arm Tentacle).
- It is likely that before the Arm Tentacle or Wing Tentacle dies, Deathwing will have started casting
 Cataclysm, but there should be ample time to finish off the Tentacle.
- Note that when Deathwing is casting Cataclysm, the Tentacle takes 100% increased damage, as the Aspect on whose platform you are standing begins to attack it.
Ysera's Platform
On Ysera's Platform, you can make use of the following:
- To deal with
 Impale, tanks can make use of Ysera's
  Dream ability (50% damage reduction).
 - DPS players can kill the Elementium Bolt before it lands, thanks to Nozdormu's
 Time Zone.
 - Keep the Regenerative Bloods within Nozdormu's
 Time Zone, as this will slow down their attacks.
Alexstrasza's Platform
With Ysera dead, your raid will have to cope with the loss of 20% increased healing and ![]() Dream, although this does not affect the strategy of the encounter at all.
Dream, although this does not affect the strategy of the encounter at all.
Nozdormu's Platform
The loss of Alexstrasza's buff will mean that your raid has lost the 20% health increase. Additionally, your raid will now have to manually kill the Blistering Tentacles each time they spawn. As these adds are immune to AoE, you will have to use single target attacks against them.
It is very important that all the Blistering Tentacles are killed in a timely fashion (before the next set spawns), thus allowing for the debuff that they apply to wear off.
Equally importantly, your raid should make sure not to bring the Tentacle to 70% (or close to it) until after the Mutated Corruption and the Elementium Bolt have been dealt with. Otherwise, you risk having Blistering Tentacles spawn at the same time as another raid-damaging ability is going on, most likely causing a wipe.
Other than this, nothing else changes, although healers will have to pay special attention to tanks (for ![]() Impale), as the tanks' health will be considerably lower.
Impale), as the tanks' health will be considerably lower.
Kalecgos' Platform
This platform will be the most difficult one by far. The loss of Nozdormu's buffs means that the Elementium Bolt will hit the platform much sooner (totally unslowed) and will likely have time to pulse once or twice after it has landed, dealing absolutely massive damage to the raid. Healers must be on top of their game here, and a mix of defensive cooldowns should be used.
Additionally, with the absence of the ![]() Time Zone, the Regenerative Blood adds will deal more damage to the tank.
Time Zone, the Regenerative Blood adds will deal more damage to the tank.
Finally, both DPS players and healers will have lower output here, due to the loss of the 20% haste buff granted by Nozdormu.
Phase Two
Phase Two is a rather simple burn phase. Once all the 4 platforms are cleared, Deathwing will slump forward and his head will land, helpless, on Ysera's platform. The phase starts with Deathwing at 20% of his health, and ends when he has been killed by your raid.
Abilities
During this phase, Deathwing does not perform melee attacks and only has a single ability: ![]() Corrupted Blood. This ability deals fire damage every 2 seconds to the entire raid. When Deathwing's health reaches 15%, 10%, and 5%, the damage dealt by Corrupted Blood increases.
Corrupted Blood. This ability deals fire damage every 2 seconds to the entire raid. When Deathwing's health reaches 15%, 10%, and 5%, the damage dealt by Corrupted Blood increases.
Throughout the phase, Deathwing will spawn two types of adds: Elementium Fragments and Elementium Terrors:
- Elementium Fragments are spawned every 90 seconds, 3 at a time in 10-man difficulty and 8 at a time in 25-man and LFR difficulties. These small tentacles cannot be tanked and have very little health. They cast
 Shrapnel, which deals a high amount of physical damage to random raid members.
 - Elementium Terrors are spawned every 90 seconds, 2 at a time. These big adds must be tanked and inflict a stacking debuff on the tank:
 Tetanus (10-man/25-man).
The first wave of Elementium Fragments comes 10 seconds into Phase Two, while the first wave of Elementium Terrors comes 40 seconds into Phase Two.
Strategy
The strategy for Phase Two is quite simple. Your raid should begin the phase by burning Deathwing. Because the damage that he deals to the raid increases progressively when he reaches 15%, 10% and 5% health, your raid should stop DPS before the 10% threshold, finish off any adds and then proceed to burning Deathwing.
Healers will have to deal with the increasing raid damage from Corrupted Blood. Especially after Deathwing reaches 10% health, healing will become extremely difficult and any available cooldowns should be used.
The adds spawned during this phase should be dealt with as follows:
- Elementium Terrors should simply be picked up (each by one of the tanks) and DPSed down before the stacking
 Tetanus (10-man/25-man) kills the tanks. It is ideal to tank these in the
  Time Zone provided by Nozdormu.
 - Elementium Fragments are the most deadly aspect of the phase. They must be killed with utmost urgency. They will target random players with their
 Shrapnel ability. Targeted players will notice a debuff that they receive. When this debuff expires, they will receive a massive amount of damage. Players should use the
  Dream ability just as the debuff is about to wear off.
Essentially, the DPS priority in this phase is:
- Elementium Fragments;
- Elementium Terrors;
- Deathwing.
Once the second set of Elementium Terrors have been killed, Deathwing should have around 11% health and your raid should execute an all-out DPS burn on him, ignoring the next set of Elementium Fragments.
When to Use Bloodlust/Heroism/Time Warp?
There are two important parts of the fight where using ![]() Bloodlust,
Bloodlust, ![]() Heroism, or
Heroism, or ![]() Time Warp will greatly help.
Time Warp will greatly help.
You can use Bloodlust, Heroism, or Time Warp during Phase One, to help your raid clear the 4th platform, either to help you kill the Mutated Corruption faster or to help you finish the Arm or Wing Tentacle before Deathwing finishes casting ![]() Cataclysm.
Cataclysm.
You can use Bloodlust, Heroism, or Time Warp during Phase Two, when Deathwing's health reaches 10%, to shorten the period during which your raid will take increased damage. In this case, you can also use Bloodlust, Heroism, or Time Warp right at the start, as there will be enough time for the 10-minute debuff to drop.
Tier 13 4-piece Tank Set Bonuses
Tanks can use their 4-Part tier 13 set bonuses (all of which offer either damage reduction or increased health to the raid) at certain key points, in order to help the healers deal with the high amounts of raid damage. Specifically, these bonuses are of use:
- When an Elementium Bolt is landing (i.e., after Nozdormu's buffs are gone);
- When Blistering Tentacles are active (especially after Alexstrasza's buffs are gone);
- During Phase Two, after Deathwing is below 10% health.
Keep in mind that these cooldowns can only be used at the expense of the tank's own major defensive cooldown (as they are, in fact, one and the same), and as such they may not always be available.
Furthermore, it is ideal that these cooldowns be worked into a cooldown rotation by the raid leader, and not just used freely.
Learning the Fight
Despite the many enemies and abilities that this encounter presents, you should not be alarmed. The fight is easy to learn and quite easy to execute as well.
The best way to practice Phase One (the only difficult part of the encounter) is to simply try to perfect your play on the very first platform. Once all raid members are familiar with their duties, repeating the process on the other platforms, even with the loss of buffs, will prove a much easier task than it may appear.
Achievement: Chromatic Champion
The ![]() Chromatic Champion achievement is part of the
Chromatic Champion achievement is part of the ![]() Glory of the Dragon Soul Raider meta-achievement. The achievement is very straightforward; it requires you to defeat the Madness of Deathwing encounter after having started the fight on each of the 4 platforms. Naturally, this means that the achievement will have to be completed over the course of 4 separate kills, so it will take at least 4 weeks.
Glory of the Dragon Soul Raider meta-achievement. The achievement is very straightforward; it requires you to defeat the Madness of Deathwing encounter after having started the fight on each of the 4 platforms. Naturally, this means that the achievement will have to be completed over the course of 4 separate kills, so it will take at least 4 weeks.
Below, we will give you the recommended platform orders for each of the 4 starting platforms:
- Ysera > Alexstrasza > Nozdormu > Kalecgos;
- Alexstrasza > Ysera > Nozdormu > Kalecgos;
- Nozdormu > Ysera > Alexstrasza > Kalecgos;
- Kalecgos > Ysera > Nozdormu > Alexstrasza.
The first three orders should not pose any problems to your raid, with the possible exception of starting with Nozdormu, which will put a rather high strain of your healers due to the damage from Elementium Bolt.
The most problematic order will be the final one. The more gear you have, the easier this will be, so we advise you to leave it for last, as by then your raid will have obtained much more gear from Tier 13.
In this order, your raid will have to kill the Regenerative Bloods by single-targeting them down on all platforms except for the very first one, due to the loss of Kalecgos' AoE buff. For this purpose, we recommend that all DPS players in your raid always target the same Regenerative Blood as a designated player. The easiest way to do this is by use of a /assist Player macro (where Player is replaced by the player's name).
Using this macro will change your target to the target of the respective player. You should keybind this macro to a convenient button and use it each time the Blood you are targeting is about to die.
