Dragon Soul Main Page
![]()
Overview of the Fight
 The Warmaster Blackhorn encounter takes place on a flying gunship called Skyfire. The Skyfire has a health pool and can be damaged by various abilities during the encounter. Aside from defeating Warmaster Blackhorn, you will also have to ensure the survival of your ship, if you wish to succeed in this encounter.
The encounter is a two phase fight. During the first phase, your raid will mainly have to deal with 4 different types of adds (3 types of adds in LFR). You will also have to watch out for many void zones in which you must stand in order to protect the gunship. If 3 waves of adds are dealt with successfully, the second phase will begin. During this phase, your raid will have to deal with Warmaster Blackhorn himself.
Phase One
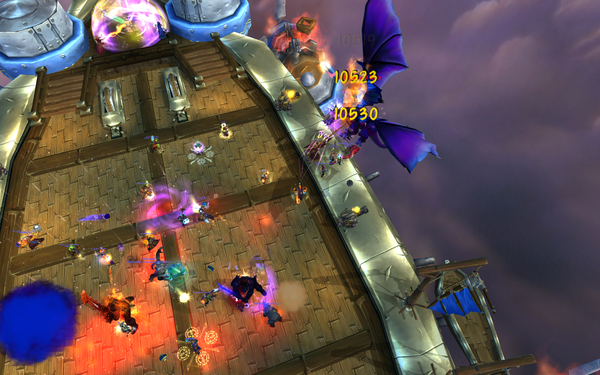 The encounter begins when you talk to Captain Swayze. During this phase, you will not fight Warmaster Blackhorn (he is flying in the air, on his drake, Goriona). Your raid will be under constant assault from Goriona as well as from four types of adds:
- Twilight Assault Drakes;
- Twilight Elite Dreadblades;
- Twilight Elite Slayers;
- Twilight Sappers (absent in LFR).
Below, we will list all of the abilities that Goriona and the Twilight adds will use during this phase. After that, we will provide you with the adequate strategy for completing the phase.
Abilities
Goriona
 Goriona uses a single ability during this phase:
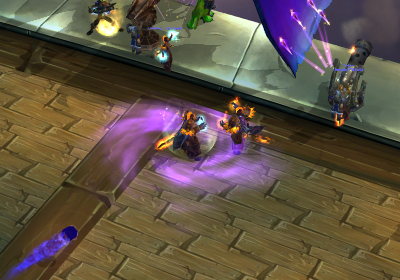
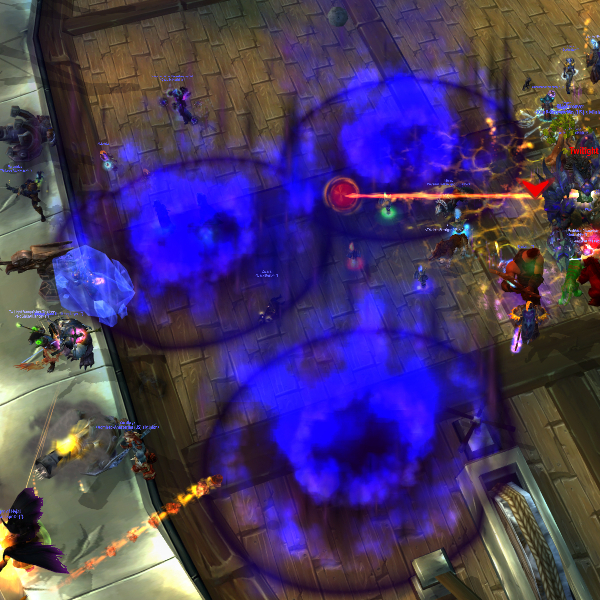
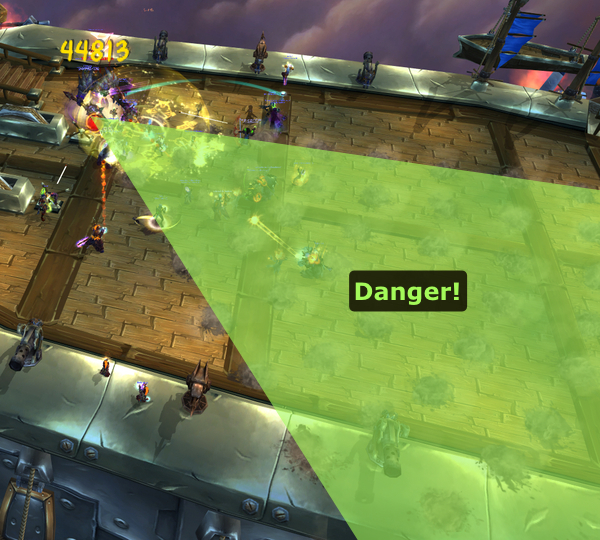
 ![]() Twilight Onslaught (10-man/25-man/LFR). This launches a large projectile at a random location on the gunship (represented visually by a void zone), roughly every 35 seconds. Once the (slow traveling) projectile lands there, it deals a large amount of damage (1,500,000 in LFR difficulty, 800,000 in 10-man difficulty and 2,000,000 damage in 25-man difficulty), split between all players within its (10 yard) area and the gunship.
Twilight Onslaught (10-man/25-man/LFR). This launches a large projectile at a random location on the gunship (represented visually by a void zone), roughly every 35 seconds. Once the (slow traveling) projectile lands there, it deals a large amount of damage (1,500,000 in LFR difficulty, 800,000 in 10-man difficulty and 2,000,000 damage in 25-man difficulty), split between all players within its (10 yard) area and the gunship.
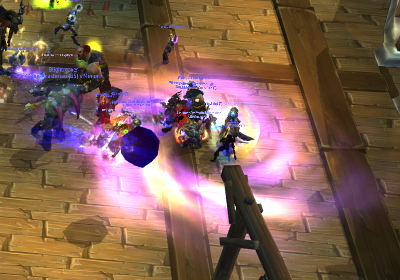
Simply put, most (if not all) of your raid members will need to stack in these void zones, in order to split the damage (making it healable) and to protect the gunship from taking too much damage.
Twilight Assault Drakes
 Twilight Assault Drakes initially drop off the other 3 types of adds. After they drop off the adds, however, they remain around the gunship, firing smaller and less harmful versions of Goriona's
 ![]() Twilight Onslaught (10-man/25-man/LFR) at the ship. Their ability is called
Twilight Onslaught (10-man/25-man/LFR) at the ship. Their ability is called ![]() Twilight Barrage, and it should, essentially, be dealt with in the same way as Twilight Onslaught.
Twilight Barrage, and it should, essentially, be dealt with in the same way as Twilight Onslaught.
It is important to note that, unlike Twilight Onslaught, Twilight Barrage will not deal any damage to the Skybreaker as long as at least one player takes damage from it.
The number and frequency of Twilight Barrage will depend on how many Twilight Assault Drakes are alive at the time, but essentially, they happen only a few seconds apart.
Twilight Elite Dreadblades and Twilight Elite Slayers
Twilight Elite Dreadblades and Twilight Elite Slayers are adds with distinct Warrior characteristics. In addition to a dealing moderate damage with their melee attacks, they each perform two abilities (one is shared between them and the other leaves a stacking DoT).
 Blade Rush is performed by both Dreadblades and Slayers. Essentially, the adds will charge a random raid member, dealing damage to every player in their path to the target. The Blade Rush is easy to notice, and players who are in the path towards the target should move away.
- Twilight Elite Dreadblades cast
 Degeneration (10-man/25-man/LFR). This is a frontal cone attack that deals a moderate amount of Shadow damage, and also places a DoT on the affected players, which lasts for 1 minute and stacks with each new application.
 - Twilight Elite Slayers cast
 Brutal Strike (10-man/25-man/LFR). This ability is very similar to Degeneration, with the only differences being that it deals physical damage instead of Shadow damage and it does not have the frontal cone component (it is purely single target).
Neither Degeneration nor Brutal Strike appears to have a fixed frequency of application. Rather, the mobs seem to apply this every 7-20 seconds, and the application can be dodged or parried.
The only players affected by these cone attacks should be the tanks. In order to reset the stacks of the DoTs, tanks will need to switch the adds between them.
Twilight Sappers
Twilight Sappers are adds that focus entirely on damaging the gunship. Immediately after being dropped off by the drakes, these adds will go invisible, before reappearing a few seconds later.
After reappearing, the adds will run towards the back of the ship, casting ![]() Detonate if they reach it. This deals 20% of the ship's maximum health in damage, and also deals some damage to players within 8 yards of the explosion.
Detonate if they reach it. This deals 20% of the ship's maximum health in damage, and also deals some damage to players within 8 yards of the explosion.
Strategy
Phase One is all about add control and raid damage. Your goal is to survive 3 waves of adds, while also keeping the gunship from being destroyed. Each wave of adds consists of 1 Twilight Elite Dreadblade, 1 Twilight Elite Slayer and 2 Twilight Assault Drakes. Twilight Sappers appear to spawn on a separate cooldown, not directly linked to the waves, and you will probably have to kill 5-6 of them before Phase Two starts.
Handling the Adds
Essentially, you will want your tanks to pick up the Twilight Elite Dreadblades and the Twilight Elite Slayers as soon as they land, and start DPSing them. It is ideal to kill one before damaging the other, so that there are fewer DoTs for your tanks to worry about.
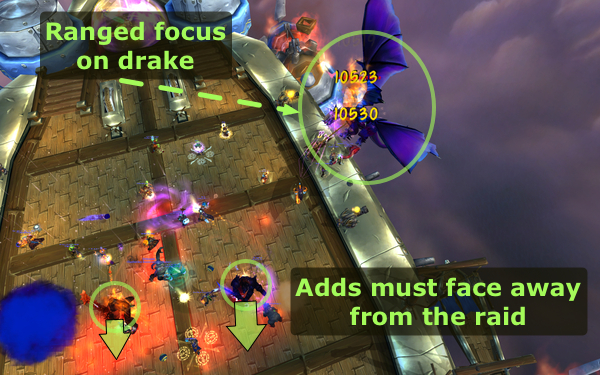 Tanks should face the Dreadblades away from the raid, so that no other players are affected by the cleave. This is of special importance if the tanks are moving into the void zones from
 ![]() Twilight Onslaught (10-man/25-man/LFR). It is imperative that the adds do not face the location where the raid is stacked.
Twilight Onslaught (10-man/25-man/LFR). It is imperative that the adds do not face the location where the raid is stacked.
The Dreadblades and Slayers should be tanked at one of the sides of the ship, where the harpooned Twilight Assault Drakes get reeled in. This allows melee DPS players to also cleave the drakes when they are in range.
Finally, tanks should alternate which add they tank, on a wave by wave basis, giving the debuffs a chance to drop off. For example, Tank A tanks the Dreadblade on the first wave, the Slayer on the second wave and the Dreadblade again on the third wave.
Whenever a Twilight Sapper lands, all your DPS players should focus them down and kill them. They can be slowed, ![]() Death Gripped and stunned.
Death Gripped and stunned.
It is possible to ignore one or more Sappers, provided that the gunship has enough health to survive the end of the phase (there is no damage to the gunship in Phase Two) and you wish to make better use of that DPS time.
Friendly NPCs will regularly harpoon Twilight Assault Drakes, reeling them in, close to the ship, where they should be damaged by your ranged DPS players.
Therefore, the priority for add killing during Phase One is as follows:
- Twilight Assault Drakes (when they are close enough to the ship to be damaged by ranged DPS).
- Twilight Sappers (as soon as they land, unless your raid is opting to ignore them and let them through).
- Twilight Elite Dreadblades and Twilight Elite Slayers.
Special Mention Regarding the Drakes
Technically speaking, the Twilight Assault Drakes are not part of the waves. They simply fly around the ship dropping ![]() Twilight Barrage. The more Drakes alive, the more Twilight Barrage the raid has to deal with.
Twilight Barrage. The more Drakes alive, the more Twilight Barrage the raid has to deal with.
Every time a new wave of Twilight Elite Dreadblade and Twilight Elite Slayer appears, the ship NPCs will reel in two Drakes randomly chosen from amongst the remaining Drakes. If you fail to kill a Drake before the next wave of adds, then it will be released and will go back to launching Twilight Barrage on your raid. This is especially bad because this already damaged Drake might be reeled in again by the NPCs for the next wave of adds, possibly leaving your ranged DPS to finish off any remaining drake before Phase Two begins.
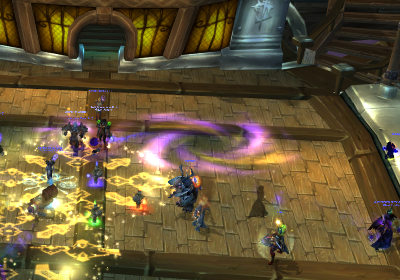
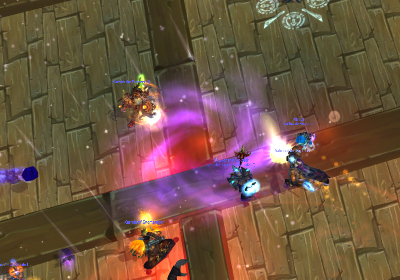
Soaking the Void Zones
Simply dealing with the adds is not sufficient to complete this phase successfully. Your raid members will need to constantly soak the damage from the void zones: ![]() Twilight Barrage and
Twilight Barrage and ![]() Twilight Onslaught (10-man/25-man/LFR), in order to keep the damage done to the gunship under control.
Twilight Onslaught (10-man/25-man/LFR), in order to keep the damage done to the gunship under control.
 Twilight Barrage is easy to soak. It deals a low amount of Shadow damage (150,000 in LFR difficulty and 200,000 in 10 and 25-man difficulty). As a result, it is enough if two players move into these void zones. If a player is topped off (especially a tank), they can soak these alone.
 If the ship's health is dangerously low, for some reason, then you should have more players soaking, in order to reduce the damage that the ship takes. Ranged DPS players and healers should be preferred for this task, as they can generally continue to perform their duties even while standing away from the adds.
Twilight Onslaught will require a much larger number of your raid members to soak efficiently. You should always aim to have your entire raid soaking these, in order to keep the damage manageable and to avoid sudden deaths.
Phase Two
 After 3 waves of adds have been defeated (specifically, when all the Twilight Assault Drakes are killed), Warmaster Blackhorn jumps on the ship, marking the start of Phase Two.
During this phase, you will initially have to damage Goriona (who is still flying in the air, alongside the gunship), after which you will have to focus entirely on Blackhorn. Also, the gunship no longer takes damage, so the entire raid should focus on Goriona and Blackhorn while avoiding damaging abilities.
We will present you with the abilities of this phase before explaining the strategy.
Abilities
Goriona
 Goriona has a single ability that she uses during this phase:
 ![]() Twilight Flames. This launches a ball of flame at a random player, dealing massive damage at the location where the ball lands. Additionally, flames will persist on the ship for a short while, in that location, dealing moderate damage every second to players standing there.
Twilight Flames. This launches a ball of flame at a random player, dealing massive damage at the location where the ball lands. Additionally, flames will persist on the ship for a short while, in that location, dealing moderate damage every second to players standing there.
Goriona is in range of ranged DPS players who must attack her. Once she reaches 25% health, she will fly away, leaving the encounter.
Warmaster Blackhorn
Warmaster Blachorn uses the following abilities during Phase Two:
 Vengeance is an enrage that Warmaster Blackhorn gains throughout the phase. He deals 1% increased damage for each 1% of his health that is missing.
 Devastate is a typical sunder armor effect, that lowers the tank's armor by 20%, and deals a moderate amount of damage with each application. The debuff lasts 30 seconds and stacks, requiring a tank switch.
-
 Disrupting Roar (10-man/25-man/LFR) deals a moderate amount of damage to all raid members, also interrupting and silencing any spell casting from players within 10 yards for 8 seconds. Blackhorn casts this ability roughly every 20 seconds. It is important that casters remain further than 10 yards away from the boss.
 -
 Shockwave is a frontal cone attack that deals a massive amount of damage to anyone in front of Warmaster Blackhorn and stuns them for 4 seconds. Blackhorn casts this ability roughly every 25 seconds. It is important to note that Warmaster Blackhorn will often face a random raid member before casting this ability, so it may end up targeting the raid.

Strategy
This phase is much simpler and a lot less chaotic than Phase One. As soon as the phase begins, a tank should pick up Blackhorn and move him to the center of the ship.
Melee DPS players should attack Blackhorn, while ranged DPS players should aim at bringing Goriona to 25% health as soon as possible. Everyone will need to move out of the fire from Goriona.
Once Goriona leaves the fight (when she reaches 25% health), everyone can focus fully on Warmaster Blackhorn. Follow the steps below to ensure a smooth kill:
- Make sure that the raid is spread around Warmaster Blackhorn, so that as few people as possible will need to move for each Shockwave (it is marked by a visible graphical effect). Players should try to be close to the boss, making it easier to move out of the conic area.
- Have your tanks taunt Warmaster Blackhorn off of each other at 2 stacks of Devastate.
- If you are a caster, stand at least 10 yards away from the boss. This will prevent Disrupting Roar (10-man/25-man/LFR) from interrupting your casts and silencing you.
Healers should expect moderate to heavy tank and raid damage. The boss' ![]() Vengeance will cause him to deal increasing amounts of damage.
Vengeance will cause him to deal increasing amounts of damage.
As the fight progresses, tanks should work out a defensive cooldown rotation, and should coordinate with healers for a better result.
Learning the Fight
As the two phases of this encounter are quite distinct from one another, you will have to master each of them on its own.
For Phase One, your most important goal, to begin with, is to keep the Skyfire alive. So, focus on soaking the void zones and (if needed) killing the Sappers.
Once your DPS players are comfortable with the movement required, killing the Dreadblades and Slayers efficiently should not be a problem.
Phase Two's greatest challenges will be stabilising the raid's health while both Blackhorn and Goriona are active. At the same time, the raid will need to deal with increasing damage and, towards the very end of the fight, healers out of mana.